
How To Make An Engagement Ring
3rd Sep 2024
Dreaming of crafting the perfect engagement ring?
Whether you're creating a timeless piece for a loved one or designing a unique ring to sell, you're in the right place.
In this post, we go into the details of what makes a great ring.
Tools Needed
Here are the tools you’ll need to create your ring from scratch (you can skip some of these if you’re pre-buying your band or setting):
- Graph Paper - For plotting exact dimensions.
- Wire Cutters - For cutting the wire to the desired length.
- Marker Pen and Safety Ruler - For measuring and marking the wire.
- Piercing Saw with 2/0 Blade - For cutting the wire and creating notches in your setting elements.
- File Set (including Needle Files) - For filing the ends of the wire and other detailed work.
- Smooth Jaws Parallel Pliers – An essential pair of pliers, capable of carrying out many tasks to an acceptable standard.
- V-Notch Pliers - For holding the metal in place while filing.
- Half-Round or 2-Step Curved Jaws Pliers - For forming the ring shape.
- Soft Plastic or Nylon Jaw Pliers - For ensuring the ends meet flush and manipulating the metal.
- Ring Mandrel - For shaping the ring into a perfect circle and forming the bezel.
- Flux - For preventing oxidation during soldering.
- Solder (Hard, Medium, Easy) - For soldering the joint.
- Torch - For heating and soldering the ring.
- Bench Vice - For securing the ring while filing and soldering.
- Mallet - For tapping the ring into shape on the mandrel.
- Annealing Tools - For heating the band to make it more pliable (if needed).
- Sanding Paper (Various Grits) - For sanding the ring.
- Polishing Compound and Buffing Wheel - For polishing the ring.
- Ultrasonic Cleaner - For cleaning the ring.
- Callipers - For measuring the stone's circumference, diameter, and height.
- Round and Flat Jaw Pliers - For bending and forming the setting.
- Snipe-Nose Pliers - For aligning the prongs.
- Pickle Solution - For cleaning after soldering.
- Third-Hand Tool - For holding the ring while soldering.
- Bezel Rocker/Pusher - For setting the gemstone in a bezel setting.
- Cup Bur - For finishing the prongs.
- Ring Clamp - For securing the ring while setting the gemstone.
- Thermoplastic Modelling Polymer - For stabilising the piece while setting the gemstone.
- Burs - For cutting notches in prong settings.
- Bench Peg - For bracing the setting.
Designing Your Ring
The first step in any project is to consider how you want your ring to look.
You can take inspiration from rings you’ve seen online or in a shop, or come up with something completely unique.
The key considerations are:
- Setting – how will your stone be held in place? The traditional prongs, a completely surrounded bezel style, or held above the band in a cathedral setting.
- Material – decide what material you want each part to be made from, be it gold, platinum, or something else.
- Gemstone – diamonds are a classic, but you may be interested in other stones too.
- Dimensions - Use graph paper to plot the exact dimensions. This helps in visualizing the scale and ensures that all elements are proportionally accurate. Each segment of the ring should be accounted for, including allowances for the thickness of the band and depth of the setting.
Making The Ring Band
Most engagement ring bands are made from platinum, sterling silver, or gold.
Here’s how to make them:
Wire Length for Ring Size
The first step is to accurately calculate the wire length you need, which is critical to ensure a perfect fit.
Use the formula Length=π×(Diameter + Wire Thickness) to calculate the required length, adding an extra centimetre to accommodate the soldering overlap (π can be approximated as 3.14).
But don’t worry, because we’ve created a quick reference table to calculate the length you need.
The measurements below include 2-3mm of extra length to account for filing/soldering:

Cutting & Filing

Measure and mark the desired length with a marker pen and safety ruler.
For cutting, you have two options:
- Piercing saw with a 2/0 blade: Provides a flush cut with minimal filing but takes longer.
- Hard wire cutters (like these): Quicker to use but will likely require more filing.
Next, file the ends using a fine-grit needle file for precision. You may already have a ring clamp, or some Smooth Jaws Parallel Pliers that will provide a good secure grip to hold your ring wire in place whilst you file. For the most secure grip, we recommend V Notch Parallel Pliers, specially designed for working with jewellery wire.

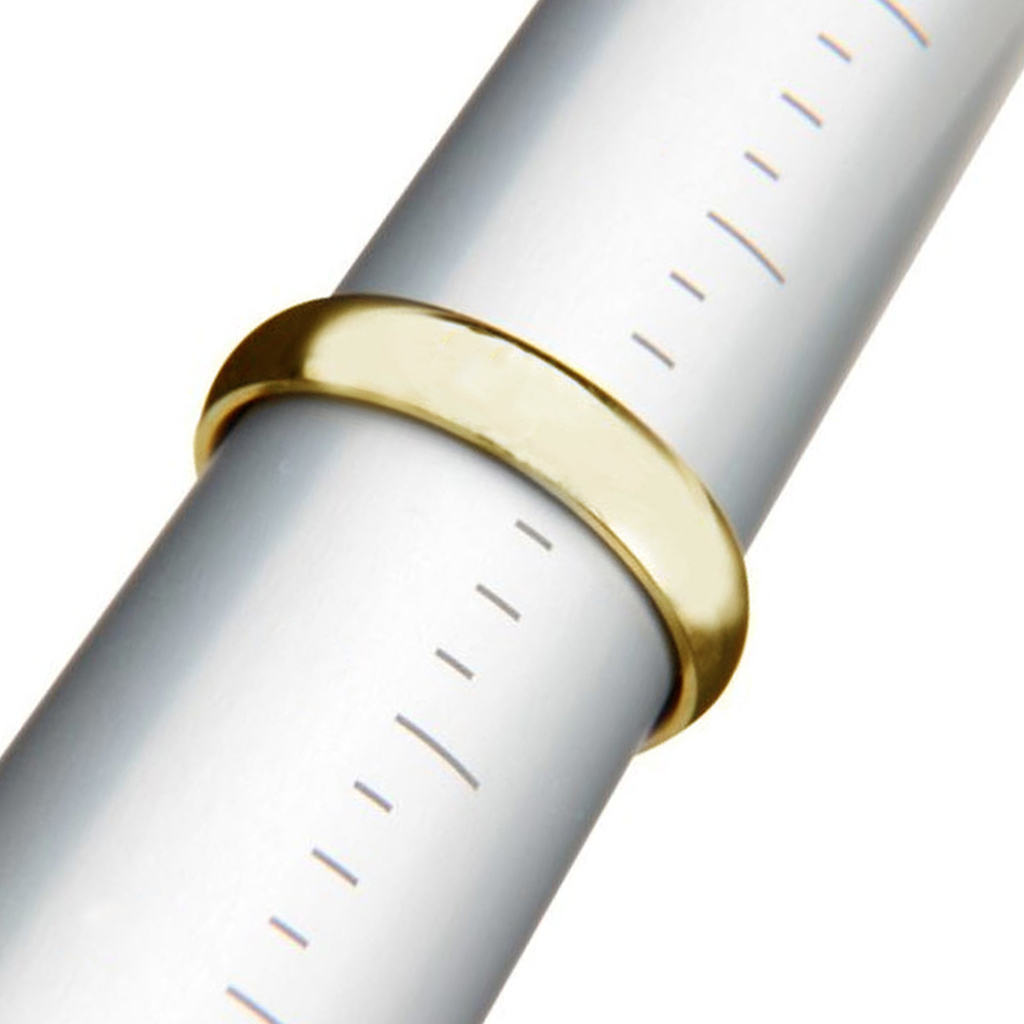
Forming The Ring Shape
Use pliers to form an approximate oval or circle with the wire. Regular Smooth Jaws Parallel Pliers can be used, however you may find using parallel pliers with a curved surface, like the Half-Round and Flat Jaws Parallel Pliers or the 2-Step Curved-Edge Smooth Jaws Parallel Pliers, enable you to create a shape closer to your final size.
Tighten and size your ring using a ring mandrel and mallet.
Next, use the pliers that you shaped the ring with and a second pair of pliers to ensure the ends meet flush. For the second pair of pliers you could consider using a Smooth Jaws Parallel Pliers or Plastic Jaws Parallel Pliers for example. Bend the tips of the metal ring past the meeting point, then bend them back, to ensure greater tension and a better join.
Check that there are no light gaps between the ends; file further if necessary.

Soldering & Filing
Apply flux to the join to prevent oxidation, ensuring it covers the entire seam.
Cut small pieces of solder appropriate for the size of the joint, and place them next to the joint.
You want to use the hardest type of solder for this, as you’ll be further soldering later on, and you don’t want this join to melt during that process.
Adjust the temperature of your torch for the type of solder you are using:
- Hard solder: 1450°F (788°C)
- Medium solder: 1390°F (754°C)
- Easy solder: 1325°F (718°C)
- Use the torch to heat the entire band to prevent thermal shock, then concentrate the flame on the join, until the solder melts and flows around it.
File away any excess solder with the ring secured in a bench vice.
Shaping
Place the band on a ring mandrel and gently tap with a mallet to achieve the perfect round shape.
If needed, you can anneal the band to make it more pliable, but it will then need to be hardened to prevent it from becoming misshapen.
Sanding & Polishing
How much you need to sand and polish your ring depends on the type of metal used.
- Gold is relatively soft, especially in higher karats (18k and above). It scratches easily but also polishes quickly.
- Silver is similar to gold in terms of softness but can tarnish, which might require additional surface preparation to remove oxidation.
- Platinum is much harder and denser, making it more resistant to scratches but also more challenging to polish.
- Palladium is similar to platinum but slightly softer, though still harder than gold and silver.
Sanding removes any scratches and prepares a smooth surface to polish from.
It comes in different levels of grit, and how many different types you need varies on the material:
- Gold (soft) – start on 180 grit, then work up to 400.
- Platinum (hard) – start low, and work through your entire grit range, up to 3000.
Polishing at this stage is easier than when the setting is attached:
- Start with a coarser compound first, then move on to a finer compound for the final finish.
- Apply your polishing compound to a buffing wheel, and gently press the ring against the wheel, moving it back and forth to cover all areas evenly.
- Regularly rotate the ring to ensure an even polish and prevent overheating, which can cause warping or discolouration.
- Clean the ring in an ultrasonic cleaner or with mild soapy water to remove any residual polishing compounds.
Make The Setting
Engagement rings usually have one of these types of settings:
- Prong: a more delicate setting designed to provide maximum light, with prongs extending to the sides and over the stone, which is then compressed downwards to secure it in a more delicate manner.
- Bezel: a metal strip cut to the same height as the stone, formed into a loop, and compressed inwards all around to secure the stone. These offer a seamless contemporary look.
Here’s how to make each:
How To Make a Prong Setting
Here’s how to make a prong setting for a round stone:
- Create two setting rings – Start by using calliper's to measure the stone’s circumference or diameter, just above the base and halfway up the stone. Match this to a position on a Round Jaws Parallel Plier or Round & Flat Jaws Parallel Plier and wind a small number of loops at each position and cut them from the coil. For stones with larger diameters you might also consider using the 2-Step Curved-Edge Smooth Jaws Parallel Pliers. File the ends flat, bend them into circles using an appropriate round or curved jaw plier, and then nip the ends in, as you did with the main ring, before soldering the ends together.
- Make your prongs - Cut lengths of metal wire about 1.5 mm in diameter. The length should be approximately twice the height of the stone plus 5 mm for adjustments and securing. File one end of each prong to a tapered point to better secure the stone.
- Mark and cut in 4 equally spaced notches on both setting rings using your piercing saw. Solder each prong to the setting rings, ensuring they are perfectly upright and evenly spaced.
- Use Snipe Nose Smooth Jaws Parallel Pliers or Round Jaws Parallel Plier to gently bend the prongs so they align properly with the stone's curvature.
- Finish by filing down any sharp edges or irregularities using a needle file, ensuring the edges are even.
How To Make a Bezel Setting
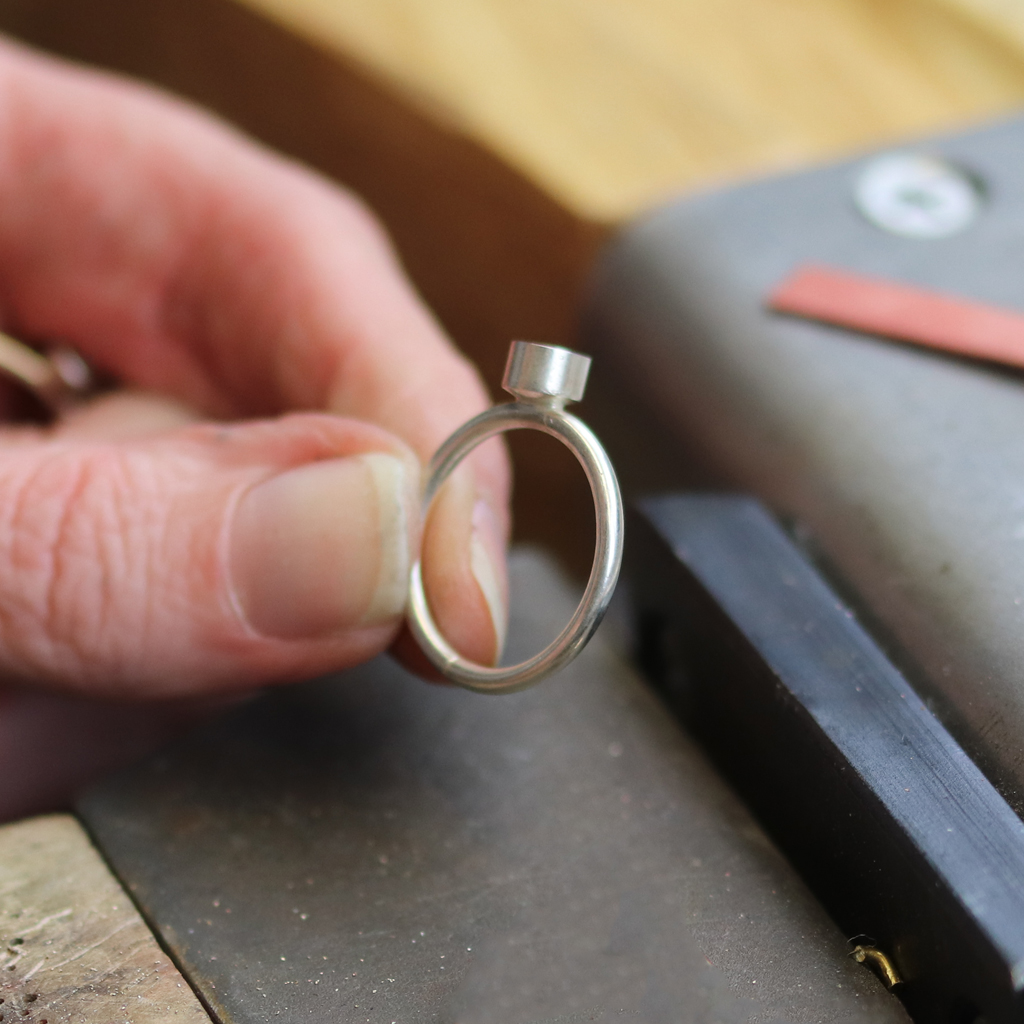
Here’s how to make a bezel setting for a ring:
- Start by using callipers to measure the stone’s diameter, circumference, and height.
- Then, cut a strip of metal roughly 0.5mm thicker than the height of the stone and 1-2mm longer than the circumference – this allows for the thickness of the metal, overlap for soldering, and an edge to secure over the stone (we recommend cutting it with these wire cutters).
- Use a Round Jaws Parallel Plier, Round & Flat Jaws Parallel Plier or a mandrel to form the metal to a size 0.5mm smaller than the diameter of the stone, to ensure a snug fit. You may wish to use this alongside a pair of Nylon Jaws Flat Nose Parallel Pliers to help manipulate the metal, particularly if it’s thicker.
- Now file the edges and bring them together until they meet perfectly flat, adjusting as necessary.
- Solder using a small piece of solder, apply flux and heat until the solder flows. Immediately quench in water and immerse in a pickle solution for cleaning.
- Test fit the bezel around the stone; it should fit snugly but not be overly tight, allowing the stone to sit flush without forcing it.
- Now cut a small disc from sheet metal for the base of your setting, flux both pieces, and solder them together (take care to ensure your bezel is centred and upright). Quench and clean.
- Daylights (optional) – you can make small cuts into the bezel to let more light into the stone. To do this, hold your setting in a pair of Round And Flat Jaws Parallel Pliers or Fine Nose Round And Flat Soft Plastic Jaws Parallel Plier rest it on your bench peg, and use a jewellers saw to make the cuts.
- Finish by filing down any sharp edges or irregularities using a needle file, ensuring the edges are even.
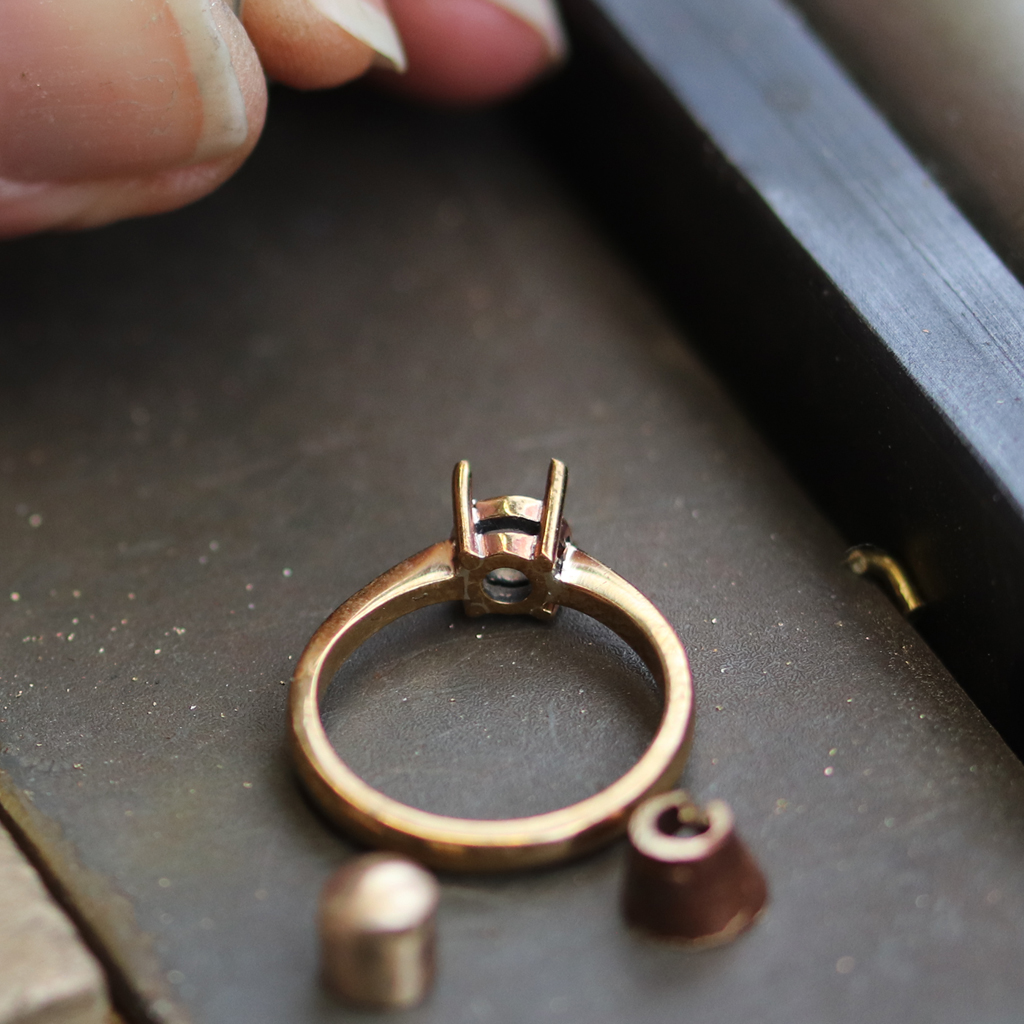
Insert The Setting Into The Band
Here’s how to join the ring band to your setting:
- Make sure both the band and setting are cleaned first.
- Use callipers and a fine marker to mark the exact spot where the setting will be attached, to ensure perfect symmetry.
- If any of the areas to join are polished, lightly sand them to ensure they join better.
- Place your setting unturned on a flat surface, use a “third hand” to hold your ring band, and align it perfectly over your setting. Jewelry Arts Inc’s video recommends creating a cross on your workbench with a ruler, so you have straight lines to help visually align it.
- Apply flux to both parts (as solder only flows where the flux is), and position small pieces of solder around the join. Heat the entire piece with a torch, so it comes to a uniform temperature, then concentrate the flame onto the solder once the entire piece is hot enough. Ensure the solder flows into all the gaps for a secure bond.
- Allow the piece to cool, then quench in water.
- Now place it in a pickle solution to remove flux and oxidation.
Add The Stone
In this section, we will embed the gemstone in your ring setting.
Before you start, make sure you have fully cleaned the inside of your setting.
- The first step is to clamp your ring securely, so it doesn’t move. This can be done with a ring clamp. You could also use thermoplastic modelling polymer to form around your piece to keep it stable.
The next step depends on the type of setting you’ve chosen:
For a prong setting
- Place your gemstone on top of the setting, so you can visualise the shape and decide where it needs to sit. Make a mark on each of the Claws where the gemstone sits level. Be sure to mark all of the claws and check that all of the marks are level.
- Using an appropriately sized bur, cut a 1/3 notch into the claws level with your markings. This is going to allow the gemstone to sit into the claws and allow you to bend them more easily, without them becoming weak. You shouldn’t make the entire cut at once, instead, do it gradually, checking against all other markings and cuts to ensure your stone will remain level.
- Next, insert your stone into the setting, and use Snipe Nose Smooth Jaws Parallel Pliers to begin closing the setting around the stone. The best way to do this is by compressing opposite claws at the same time from above. You want to first bring them inwards, and then tilt your tool so the pressure is applied on top of the gemstone, to create a secure finish.
- Carefully file down any excess material on the claws using needle files with a safe edge to avoid any damage to your gemstone. Your finish should leave you with claws of equal length and enough metal to secure the gemstone, without crowding it out.
- Next, use a bezel pusher/rocker to firmly press down on the setting edge. This allows you to apply much greater pressure than pliers, to completely remove any gaps between the gem and the setting. It prevents threads or hairs from getting stuck inside the claws.
- The next step is to file down the edges of the setting to create the perfect shape, rounded against the stone. Then use a cup bur to create a perfectly round finish.
For a bezel setting
- Place your gemstone inside the setting and brace the setting against your bench peg.
- Using your bezel pusher/rocker, firmly press the metal inwards towards the gemstone, a bit at a time, doing opposite ends after each other. EG if you visualise a compass, if you start pushing from North, then the next one you do would be from South.
- Continue this until all sides have been pushed in, and it looks relatively circular and smooth.
- Next, use the rocker to push downwards over the lip of the stone, to fully secure it, using the same opposite end method as in the first step.
Polish
Use a series of increasing fine abrasives and a polishing wheel to polish your ring, in the same way we did when creating the band.
Clean the entire ring in an ultrasonic cleaner to remove any remaining polishing compounds or debris.
Final Summary
At this point, you should have a beautiful engagement ring ready to give or sell.
If you have any feedback or improvements you’d recommend for this post, we’d love to hear from you.
This post was brought to you by Maun, experts in tools since 1944.
Scroll back up to re-read any key points, browse our related pages below, or contact us with any questions: